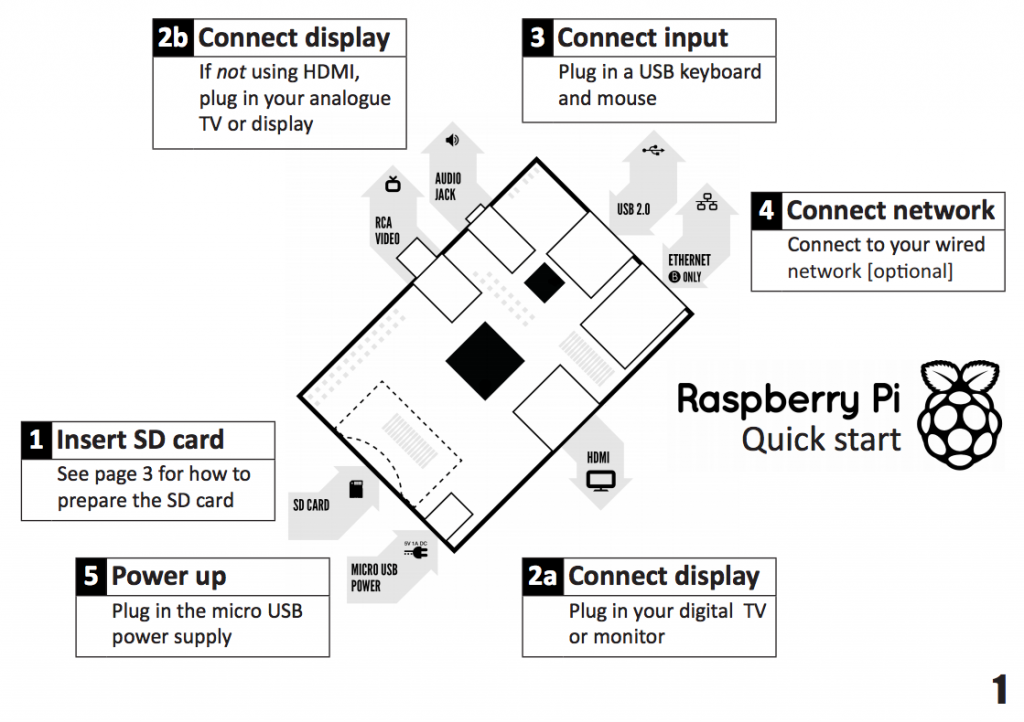
So first of all once you have your Raspberry Pi, you should mount the OS image on the SD card. Some RPi comes with an SD card with everything setup. If that's the case, you are lucky and can skip this post. Otherwise, just connect the SD card to the machine and mount the OS image on it. To do so you first need to download the image from here. I'm using the Raspbian Wheezy, which is an optimised version of Debian for RPi. After having downloaded the image, unzip it and download this app. Unzip it and open it. It will ask you to locate the image of the OS first, then you will have to choose the SD card on which you want to mount the image, and finally your password. After it is done, you can remove the SD card and plug it into your RPi. The following image shows how to set up the wirings for your RPi.
Now you have everything ready to start programming on your RPi. In the next post (hopefully) I will show how to set everything up at a software level to start your own Node.js server on it.

0 comments:
Post a Comment