Friday, February 7, 2014

The Blog Has Moved!

Hi all,

I'm finally (almost) done with transitioning the contents from here to the new domain, www.disasterjs.com . From now on I will update that blog, but I'll keep this open for a while so that people can find me there!

See ya on the new domain!

Thursday, February 6, 2014

Surprise? Not really...

Hi all,

as mentioned in the previous post, I wanted to make a huge surprise to all of you. I bought a couple of weeks ago a domain for this blog, here! Yay! But... I had several issues setting it up, and I'm still struggling to bring all the old posts there and make it work. When everything is going to be setup, I will close this blog and move to the other one!

In the future I have to finish the streaming history as it is taking a long time to end... and then I have already a couple of ideas in mind as for working reasons I'm going to treat REST, thus I might end up posting a couple of entries about it.

Stay tuned, and sorry for the lack of updates!

Sunday, February 2, 2014

Happy new year!

I know it's a bit late, but happy new year! I had many deadlines coming and I couldn't really update the blog. I have a couple of ideas for articles but I don't really have time to write them. Anyways I'm working on a surprise. Hopefully by tomorrow I will unveil it!

Stay tuned!

Saturday, December 28, 2013

Streaming Systems history, part 3

Finally, here we are on the third part of the streaming system history. I'm sorry it took so long, but I had many, many things to do for work and I was very busy with real life stuff.
In this part I'm going to introduce systems from 2011. If you find any mistake or anything incomplete feel free to let me know by commenting the post! Not all the 2011 systems are shown in this post, I will complete it with the final, fourth part.

In this part I'm going to quickly talk about Storm (2011) and WebRTC (2011).

Storm is a distributed computational environment, free and open source (check out the link!) originally developed by Twitter. The building blocks, where information can be manipulated and created are called "spouts" (blocks that produce data) and "bolts" (blocks that receive streamed data). With them, developers can build a pipeline; they are indeed very similar to MapReduce jobs, with the only difference that they can (theoretically) run forever. Every spout and bolt can be run by one or more worker, where the core of the Storm computation is executed.

Given spouts and bolts as basic building blocks for a pipeline, developers can build Direct Acyclic Graph pipelines. The programming language is Java, thus the programming representation is imperative. Storm pipelines can be deployed on the cloud: that is they can run on local machine and have spouts or bolts somewhere on the cloud. This implementation detail became very important as time passed by. The pipeline is dynamic at node level, that is a Storm spout or bolt can alter the number of workers at runtime. Faults are dealt by reconfiguring the pipeline at runtime thanks to some controller threads that constantly run checking for errors. I call these kind of controllers "dynamic adaptive", like the ones seen in DryadLINQ and S4.

Web Real-Time Communication (WebRTC) is an API currently drafted by the World Wide Web Consortium (W3C). It enables browser-to-browser connection for applications like video, chat or voIP. Many examples of this API have been implemented since its initial release, for example peer-to-peer file sharing or video conferencing applications. This API is not a real streaming system per se, but brings a whole new connectivity for what concerns browser applications, opening path for future browser streaming applications.

Given the fact that WebRTC is only an API, we can build any kind of pipeline (arbitrary pipelines). It can only be programmed in JavaScript, thus likewise Storm, its programming representation is imperative while the deployment, for now, is only the web browser. The pipeline flexibility is dynamic at topology level, as nodes (browsers) can connect and disconnect from the pipeline at runtime. Of course there is no fault tolerance or load balancing, thus once the pipeline is disrupted, it can't be reconstructed again. Ideally, we would need a software on top of it to do so.

This was a small part, in respect to the previous two. As I mentioned, I'm very busy lately thus I only found time to write this. The next part will hopefully be the last one (this one was supposed to be, but it turned out to be very long).
See ya!


DYHV7EDQ28UB

Monday, November 25, 2013

Streaming Systems history, part 2

Here I am again with some history on streaming systems! Today I would like to dive into systems born from 2005 to 2010. If you find any mistake please comment the post and let me know!

In this post I'm going to talk about the second generation of streaming systems: Borealis (2005), SPC (2006), DryadLINQ (2008) and S4 (2010).

Borealis is a distributed stream processing engine which inherits much from Aurora and Medusa. Aurora is a framework for monitoring application born around 2002. At the high level, the system model is made out of operators which receive and forward data thorough continuous queries. After Aurora was born, Aurora* was proposed, which is a version of Aurora with distribution and scalability. Borealis implements all the functionality of Aurora and is designed to support not only dynamic query modification and revision but also to be flexible an highly scalable.


Borealis can run Directed Acyclic Graphs (DAGs) as pipelines but not Arbitrary pipelines. A bachelor thesis (if I'm not mistaken) proposed a graphical user interface for Borealis that let users build pipelines using visual building blocks. Otherwise, one can implement a pipeline directly in C# (imperative programming). Borealis is the only one system in the second generation that supports not only deployment on clusters and the cloud, but also on pervasive devices (i.e. microcontrollers).
At runtime, it is flexible at node level to handle failures: it is capable of reinitialising a failed node while the stream is running, thanks to a replication mechanism that sends the data to the closest upstream replica. Load balancing is again performed with load shedding.

SPC stands for Stream Processing Core and is a middleware for distributed stream processing which targets data mining applications. It was built to support applications that extract data from multiple digital data streams. Topologies are composed by Processing Elements (which are what I call nodes) which implement application-defined operators that are connected by stream subscriptions.

Likewise Borealis, this system supports DAG as topology and has an imperative programming language as well as a graphical user interface. The deployment is only available on cluster of machines and the cloud. It is flexible at pipeline level, in the sense that it can change pipeline while the stream is flowing. The idea is to have the pipeline to be extended at runtime: new nodes can join the pipeline and connected to the stream while at runtime. Again like Borealis, it has replication to cope with faults and has no mean to cope with load balancing.

DyadLINQ imports a new programming model for distributed computing on large scale. It supports both general-purpose declarative and imperative operations on datasets thanks o a high-level programming language. A streaming application built with DryadLINQ is composed by LINQ expressions automatically translated by the compiler into a distributed execution plan (which DryadLINQ calls "job graph", and is a "topology") passed to the Dryad executing platform.

DryadLINQ supports DAG pipelines and both imperative and declarative programming models. The deployment is only targeting cluster of machines, while likewise SPC, it supports dynamic topology reconfiguration at runtime. Fault tolerance is indeed tackled with reconfiguration while load balancing is faced by a dynamic adaptive controller. More in details, DryadLINQ exploits some hooks in the Dryad API to mutate on runtime the pipeline to improve performance. Ideally performance is improved by aggregating nodes, thus decreasing I/O times.

Last but not least, we have S4 (Simple Scalable Streaming System), which is again a general-purpose distributed streaming platform developed by Yahoo! and inspired by the Actor model and MapReduce. It allows developers to program applications that process unbounded streams of data. Developers can set up pipelines with Processing Nodes that host Processing Elements. Each Processing Element (PE) is associated with a function and the type of event that it consumes.

Also S4, like almost all the others, supports DAGs as topology. The programming model is imperative and the deployment is possible on cluster of machines and the cloud. The pipeline is flexible at Node level, while for fault tolerance it supports reconfiguration (it can reconfigure a pipeline splitting the nodes deployed on a failed host among the remaining available execution resources) and for load balancing it again shows a dynamic adaptive controller.

And that's it. Hopefully I haven't made much mistakes.

See you next time with the last part!

Friday, November 15, 2013

Streaming Systems history, part 1

Lately I've been very busy studying streaming systems in general. I've took a look at the last decade streaming systems and what literature proposed. I want to share a little bit my findings summing up things here a little bit. I'm going to divide this series of posts in three, one for each generation of streaming systems. All the data should be more or less correct, but feel free to comment below and ask question of correct mistakes if there are! I would like to be the more precise as possible.

The first generation of streams proposes, among all, StreamIt (2002), Sawzall (2003) and CQL (2003).

StreamIt is a compilation infrastructure and programming language created to setup pipelines of streams. Users can create any kind of topology of the pipeline thanks to different kind of filters available. The filter structure available are:

  •  Pipeline: Let the user build a filter which has one input channel and one output channel, thus with a series of pipeline filters you can only build linear streaming pipelines.
  • SplitJoin: The first filter is a Split which has two output streams, then there can be different pipeline filters and at the end a Join filter which joins the work performed in parallel.
  • Feedback Loop: Let the user build a node which has two output streams, one that goes on in the pipeline and the other that feeds itself. Useful for tail recursive computations (i.e. Fibonacci).
The programming model is imperative, with a much Java/C++-like syntax. Pipelines built with StreamIt can be run on clusters of machines. To cope with load problems it has a mechanism of reinitialisation, where if a bottleneck is found, the pipeline is restarted with a different configuration to cope with the load changes.

Sawzall is a procedural domain-specific programming language which includes support for statistical aggregation of values read or computed from the input, very similar to Pig. Sawzall was developed by Google to process log data generated by Google's server. It processes one record at a time, and emits an output in tabular form. Sawzall is stateless, and thanks to MapReduce, each Sawzall program can run on multiple hosts (cluster of machines). 

Last but not least, CQL (Continuous Query Language) is an SQL based language for writing and maintaining continuous queries over a stream of data. Those queries are suitable for reactive and real-time programs; for example to keep an up to date view of data. It was implemented as a part of a project named STREAM.
Here is an example of a CQL query:

Select Sum(O.cost)
From Orders O, Fulfillments F [Range 1 Day]
Where O.orderID = F.orderID And F.clerk = "Alice"
    And O.customer = "Bob"

As you can see, CQL is much alike SQL, with the difference of having a timespan on the query (i.e. the day range in the example). This is because queries are performed over continuous streams of data, thus a time range has to be specified to get a result. In the example, the query selects the sum of the total costs of orders in one day, performed by Alice and bought by Bob.

And that's it for the first part of this streaming system history. I'm sorry about not writing something more about Sawzall, if you have some suggestions, comments or corrections please comment the post!
Bye!

Thursday, November 7, 2013

I'm still alive

Hi all, I'm sorry I couldn't post much later. I've been in vacation for a while, and then suddenly a big chunk of work arrived, and I had practically 0 time to write here. I'm not even programming anymore, just paper writing and teaching assisting. Hopefully I'll be back on track after the 15th, the last deadline for the last paper I wrote.
Until next time, see ya!

Tuesday, August 13, 2013

Install a specific version of Node.JS

Quick post (personal reminder above all) about how to install a specific version of Node.js. I'm working on Ubuntu 12.04. The idea is to clone the whole repository and then checkout only the interested version. Then install it. Here are the commands.

git clone https://github.com/joyent/node.git
cd node
git checkout "v0.8.18"
export JOBS=2
./configure
make
make install

And you are good to go!

Monday, August 12, 2013

I'm still alive - !false and !undefined in JavaScript

Hi all, I've been very busy lately, and then I went for a holiday, so I didn't update the blog. Sorry!
I recently came back from the seaside and started to work on a bug I had since forever. I thought it was a deeply rooted bug that was spread in different methods. It turns out it was not like that. And that's what I discovered:

First of all, I had this array that kept count of how many distributed processes answered a pull request. Each process has an ID, and it corresponded with the index of the array. The array first is filled with false values. As an example, imagine process ID 0 that is polled. At first the value in the array at index 0 is false, but when the process answers, I set the value in the array at index 0 to true.

If the process don't reply after a certain threshold time, I execute something. I used to check this by going through the array in this way:

for(var i = 0; i < processes.length; i++)
    if(!array[i])
        //do something

In other words, if array[i] is false, it means the process did not answer.
This could look correct if only I would take into account the fact that, concurrently, some processes may be spawned, thus increasing the processes array. Since I didn't polled the newborn processes, I don't want them to be checked. Of course, with the shown code, this was happening. Luckily, JavaScript fills with undefined the indexes of an array which have not be initialised; but on the other hand the evaluation of !undefined is the same as the evaluation of !false. This clearly lead to a bug which always executed something, even if it was not the case. Again, luckily with JavaScript I could correct this very easily:

for(var i = 0; i < processes.length; i++)
    if(array[i] === false)
        //do something

And that's it!

Monday, July 1, 2013

Read a file line by line in node.js

Hi all. Today I decided to add a small functionality to my project: when I start my framework, I run stuff one after the other with a list of commands; I decided to add a functionality that reads a particular file (which I want to be a .k file) and extract the commands from that list.
To do so I need some things:

  1. Read a file
  2. Make sure it's a .k file
  3. Split it line by line
  4. Execute each line
Reading a file in node.js is very simple. We just need to import the fs module and call the function readFile:

fs.readFile(cmd[1], 'utf8', function(err, data) {
    if (err) throw err;
    //do something with the file
});

This will read the file specified in cmd[1] (which is the input variable I give). Next, I would like to add some more checks (for example, that it needs to be a .k file):
if(cmd[1].indexOf(".k") === cmd[1].length - 2){
    fs.readFile(cmd[1], 'utf8', function(err, data) {
 if (err) throw err;
 //do something with the file    
    });
}
else{
    console.log("Not a .k file!");
}

Finally, let's read the file line by line:
if(cmd[1].indexOf(".k") === cmd[1].length - 2){
    fs.readFile(cmd[1], 'utf8', function(err, data) {
 if (err) throw err;
 
 var commands = data.split('\n');
 for(var i = 0; i < commands.length; i++){
     //commands[i] contains lines of the input
 }    
    });
}
else{
    console.log("Not a .k file!");
}

Notice the .split('\n'); function, that splits the string into an array at every '\n' occurrence. Hope it helps!

Thursday, June 27, 2013

OUYA Development

Hi all. I've been quite busy lately. I travelled more than I expected and I didn't work much on JavaScript and my project. What I did was mostly bug fixing on not-so-interesting stuff, which did not lead me to interesting discoveries about the language in general.
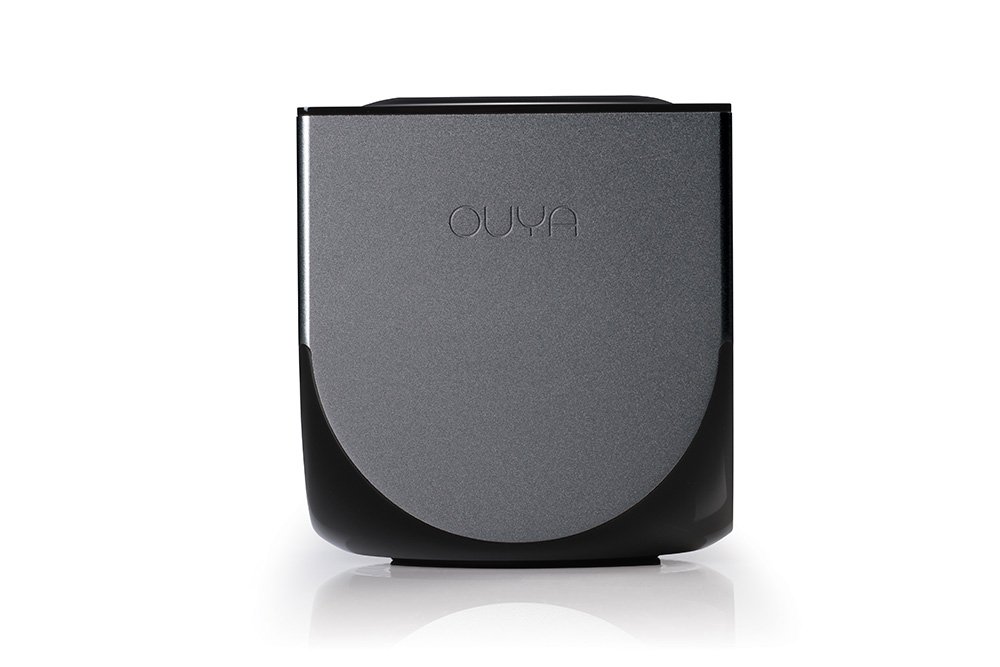
What I wanted to post today is about OUYA, this new gaming platform. It's a small console with an Android engine inside. You plug it to your TV through an HDMI cable and can start browsing the store to buy games.


Yesterday I installed the ODK, OUYA Development Kit, following the instructions here. I would like to try and write some games, as I have always been attracted by game development.
Since I don't own the console I thought I could not test what I produce. Luckily, there are some Android phones that have the same power more or less, so apparently test may be run on the virtual device from Eclipse. I will let you know if this is actually possible (I still don't see how to emulate the controller, for example...).

If I ever start programming something, I will show the outcomes here.

Tuesday, May 28, 2013

Closures...

I'm sorry for the long lack of updates. Recently I've been very busy. I travelled a lot and I had a lot of work to do, so not really much time to work on my project and discover new interesting things.
Today I want to post something that bothered me for a while. I was calling an asynchronous function, m_cli.get(), inside a for loop and wanted to keep the index variable as it was going to be used in the callback.
The first approach was the following, and of course was not working:

for(var i = 0; i < list.length; i++){
    mc_cli.get(list[i], function(err, response) {
        do_something(i);
    });
}


With this approach, the callback would always execute using the last value of i. So, for example, in the list was long 10, it would always call do_something(9). To fix the problem I tried with a closure:

do_something((function(x){return x})(i)) 


The idea is to "keep" somehow the variable so that it could call the function only when the callback returns and keeps the right index. Unfortunately, also this approach wont work. Also by creating the closure outside the for-loop and calling it in the callback would not lead to a satisfying result.
Later on, I managed somehow to fix the problem like this:

for(var i = 0; i < list.length; i++){
    (function(i){
        mc_cli.get( parsed_result.list[i], function(err, response) {
            do_something(i);
        });
    }(i));
}


The idea is that the parameter now is the input parameter of an anonymous function which will then call the asynchronous function and when the callback fires, call the do_something(i) which the local input parameter, which is the correct index (and not the last element of the array). Basically it will treat the index as an input parameter, thus "remembering" it through the execution of the asynchronous function.
Hope I helped somebody!

Friday, April 19, 2013

Running a script at startup with Raspberry Pi and Raspbian

First of all, I'm sorry for the lack of updates. I've been very busy with teaching and grading. Plus, my research is not leading me to discover new libraries or programming models, so I have nothing to write here.
Lately, I've been working with deploying my Raspberry Pi integrated with some sensors. I wanted to a robust deployment, but how to do that? Should I bring my monitor wherever I want to deploy the Pi to set it up?
Luckily there is a very easy way to do that. In this way, whatever happens (like power supply unplugged), whenever the Pi is turned on again, it will start again what it was doing, effectively removing the need of connecting it to a screen and a mouse/keyboard.
The procedure is very simple: the idea is to add a script to the /etc/init.d/ path as many of the scripts running at booting runs from there. Here's an example:

#! /bin/sh
# /etc/init.d/myscript
#

# do something like running your node.js server or client!
cd mystuff/mynodeserver/
node my_server.js

exit 0

Once you save this file in the location specified before, you should make it executable. I usually run  chmod 777 myfile.sh but some people prefer to give just the root the power to execute that, so they call chmod with 755 instead.
Once this is done, you just have to update the symbolic link to make the script execute at startup and that's it! To update them just run update-rc.d myscript default.
To remove it, run update-rc.d -f myscript remove.
And it is as simple as that. I hope I helped somebody with this little trick!


Thursday, April 4, 2013

ZeroMQ on Node.JS and Socket inspection

First of all, I'm sorry for the lack of updates. Lately I've been writing papers and not really coding. Moreover in the last few days I was on vacation, so no computer either.
Anyways. In my project I'm using ZeroMQ which is a very good socket library. I use that to make my workers communicate with each other.

Lately my main concern was message loss. Since I increase and decrease the number of workers, it may happen that some worker gets shut down when it is receiving, processing or sending a message.
The very first approach I had to solve the issue was to save the timestamp when a message was received and then wait some time. If a message was not received within that time (last_received_message - time_now > some_variable) then no messages will ever arrive anymore and I would shut down the worker. Moreover a flag would help me if a message is being processed (that is, when receiving a message a flag is set to true, when the message leaves the worker, the flag is set to false).

The problem is that I cannot possibly access the socket's queue to check what is inside and if I have to wait some more time before shutting the worker down. Eventually I found out about the getsockopt() function and its return values.
Before showing the code, I have to tell that this is not a final solution, nor the very right way to do it. For what concerns my sockets, I use PULL and PUSH. This means that I can only have two valid options for both. For the PULL socket which is read-only:

0 = nothing to read
1 = have something to read

For the PUSH socket which is write-only they are:
0 = can't write
2 = can write

BUT. The getsockopt(ZMQ_EVENTS) & ZMQ_POLLOUT > 0 does not mean there are no messages in the queue. It just means that the queue is not full and the socket is ready to accept some more for sending. On the other hand getsockopt(ZMQ_EVENTS) & ZMQ_POLLIN == 0 guarantees that the incoming queue is empty.


if(msg.command == 'kill'){
    setInterval(function(){
       var time_now = new Date().getTime();
       //if 10 seconds passed without receiving any message or no message received at all (producer or useless worker)
       if(time_now - last_message_received > 10000 && !execution_flag || !last_message_received || receiver.getsockopt(zmq.ZMQ_EVENTS) | zmq.ZMQ_POLLIN == 0 && !execution_flag){
            //kill
       }
    }, 1000);
}

So basically I set up a timeout each second that checks if something has been received, if the worker is working on something or if is not working at something AND the POLLIN value is 0.
I still have to check this approach, but the given values for the bitmasks are correct.
If you have a better idea I'm open to suggestions. For now I think I will keep it this way.

Tuesday, March 26, 2013

Citing websites on BibTeX

While writing the last paper I'm working on, I realised I also needed to cite some web reference. As I'm used to input BibTeX entries that are papers or books, I didn't really know how to cite websites.
Apparently this is not supported by BibTeX, which is strange since the web is growing more and more important nowadays, so I found out another way to cite the online resources. This is not really the correct way to do it, as it hasn't been figured out yet, and some trick were using the @MISC type. I will use the @ONLINE type:

@ONLINE{Caio:2013:Online,
author = {Caio, Tizio},
title = {Tizio Caio Website of important reference},
month = mar,
year = {2013},
url = {http://www.tiziocaio.org/ref/}
}


Some other way to turn this around include @MISC (as mentioned before), @OTHER, and @BOOKLET. The code is basically the same, and so is the result eventually:

@MISC{Caio:2013:Misc,
author = {Caio, Tizio},
title = {Tizio Caio Website of important reference},
month = mar,
year = {2013},
url = {http://www.tiziocaio.org/ref/}

@OTHER{Caio:2013:Other,
author = {Caio, Tizio},
title = {Tizio Caio Website of important reference},
month = mar,
year = {2013},
url = {http://www.tiziocaio.org/ref/}

@BOOKLET{Caio:2013:Booklet,
author = {Caio, Tizio},
title = {Tizio Caio Website of important reference},
month = mar,
year = {2013},
url = {http://www.tiziocaio.org/ref/}
}

I hope this is going to be of some kind of help, while waiting for some standard way to do it.

Friday, March 22, 2013

Arduino & Node.JS

Lately I've been experimenting quite a lot with Raspberry Pi, but I was curious about what can Node do on Arduino. So I got an Arduino and searched for some useful library to run Node on it. I immediately found out what I was looking for : Noduino.

The framework is really easy to run: just download the branch, then upload on your Arduino the du.ino file and you are good to go. I tried a very simple example given in the repo: test.walkLED.js and built a very simple circuit:


I think the most important thing was that the setup is very simple: it took me more to build the circuit than to install things. I won't paste here the example code but if you are interested I suggest you to go and check that particular example out. It shows how simple the code is to deal with such low level interfaces.

Monday, March 18, 2013

Cobbler Breakout Kit

When I first ordered my RaspberryPis, I didn't realize I would need some kind of male-to-female cables to connect the breadboard to the I/O pins on the Pis, which are male. I decided to spend I little bit more and buy the Cobbler Breakout Kits. These kits are very easy to solder and give some help in building circuits: on the board there are all the names of the pins which corresponds to the pins on the Pi. Here is one already soldered (don't mind the bad soldering...) :


It comes in 3 parts: the blue one, the black one and some small pins that have to be soldiered to the left and to the right of the blue board. First of all one needs to solder the black part, where the ribbon goes, to the board. The soldiering is done keeping the board upside down in a way that the pins of the black input are visible. Then I had to solder pin by pin: 


Then it comes to the pins on the left and right of the board. To do that I put the pins on the breadboard, then I put on top of them the board and soldered them one by one again:


Here is a top view of the breakout kit with all the names of the pins. As I said it makes like easier as you have them there and you don't have to look for an explanation of the pins.


I had many things to do this update came late. I just ordered an analog-to-digital converter. In some following update I will explain how to connect that to the Pi in order to get some analog data with digital output.


Monday, March 11, 2013

Raspberry Pi and Button Press Example

Hi there. This post is not going to be on JavaScript but it will be a bit more centered on the Raspberry Pi and what I did today. As pointed out in an old blog post, I'm working on a software that creates streams of data and pass them through a topology. As data sink, I though it would be very nice to have a Raspberry Pi which gathers data from the environment, for example.
Today I started to implement something on the RPi. Nothing serious, but I wanted to test the GPIO. First of all I had to install some Python dependencies to read data from it

$sudo apt-get update
$sudo apt-get install python-dev
$sudo apt-get install python-rpi.gpio

After this, I had to learn a little bit about the GPIO. The General Purpose Input/Output is an interface available on some devices capable of getting inputs and sending outputs. In the RPi, this is the male pins situated on top of the RPi logo in the latest devices.
The following schematics shows which pin corresponds to which usage


Today what I will do is connect a simple button and trigger some event on the RPi. The event will only be a print line saying something. The purpose of this test project was to get my hands dirty a little bit with the RPi by starting with something extremely simple.

Components

- 1 Raspberry Pi
- 1 Ribbon
- 1 Breadboard
- Some wires
- 1 10k Ohm resistor
- 1 Button sensor

How to build

Place the button on the breadboard. On the row of one pin of the button, I had to connect one head of the resistor. The other head had to be connected on another row. On the same row of this head, then, I had to connect the 3v3 pin (pin 1) of the RPi. To do that I had to use the ribbon and then use a wire from the other end of the ribbon.

I have chosen to use the pin called GPIO17 on the image shown. From that pin I connected a wire which was placed on the same row in which one head of the button and one of the resistor were placed. Finally, the ground pin was connected to the other end of the button.

Code

The code was a simple piece of Python that gathered the input from the pin number 17. Here is it:

import RPi.GPIO as gpio
gpio.setmode(gpio.BCM)
pin = 17;
gpio.setup(pin, gpio.IN)

while True:
    input = gpio.input(pin)
    if input == False:
        print('button press');
        while input == False:
            input = gpio.input(pin);

Be careful and respect indentation as Python will complain otherwise. I have chosen pin 17 but any GPIO pin will work as long as you change it in your code. The code is extremely simple: with a while True it checks if the button has been pressed. If that is the case, then, it will print the message. While the button is pressed it will just fall into the second while statement.

To run the code, just do this

sudo python filename.py

And that's it. Here is a picture of what I built.


As you can see, the blue wire is the 3v3 pin, the yellow one is the GPIO17 while the black one is ground.
I hope to build some cooler stuff and show it here.
Tuesday, March 5, 2013

Passing parameters to setInterval & setTimeout

Sometimes we need to play with timed events. JavaScript comes to the rescue giving access to setTimeout and setInterval. The first one fires only once after a certain amount of time passes, while the second one fires every time a given interval passes. For example if we give 1000 as one of the input variables to setInterval, it will fire every second.

One problem that may arise using these functions is when we want to call a function defined somewhere else and pass a parameter to it. If we try to do the following:

var myFun = function(param) {
    //do something
}

var myParam = 'parameter';

setTimeout(myFun(myParam), 1000);


Instead of executing the function after 1000ms, it will execute it immediately. This is because the compiler first interprets the function calls, like myFun(myParam), and then passes the result as the callback to the setTimeout function. To avoid this, the usual way is to pass function as a variable, thus omitting the parentheses. This of course leads to one problem: how to pass parameters to the callback function? It is done in the following way:

var myFun = function(param) {
    //do something
}

var myParam = 'parameter';

setTimeout(myFun, 1000, myParam, ...);


The three dots there indicates that each following input parameter will be treated as an input parameter to the callback function. The same concept applies for the setTimeout function.

Monday, March 4, 2013

Remote access to file through file editor on ubuntu

While taking some measure on one of my softwares, I noticed instead of going through the ftp every time to get the results, I could just open some text editor. For this things I installed gedit on the Ubuntu remote machine I'm working on. I tried the following command

gedit filename.txt

Cannot open display: 
Run 'gedit --help' to see a full list of available command line options.


As you can see it produced that error. The problem I had (and apparently is quite common), it's the fact that when I logged on my remote machine through ssh I forgot to include the correct flag:

ssh -X username@my.server.com


Mind the capital X as flag. I kept logging in with lowercase x which lead of course to wrong behaviour.
I'm sorry for the small update, but I noticed many many programmers asked this on StackOverflow, so I though it may be useful keeping it written somewhere :-).